Quick Navigation
Apache NiFi Secured on Ubuntu 20.04
This comprehensive guide covers all steps to launch, configure, and verify your secured Apache NiFi instance on Ubuntu 20.04.
Overview: This AMI provides an enhanced Apache NiFi deployment with built-in SSL, secure access controls, and enterprise features. Apache NiFi is a powerful data logistics platform that automates the movement of data between disparate systems, offering a web-based interface for designing, controlling, and monitoring dataflows.
Step 1: Launch EC2 Instance
- Navigate to the MySQL on Ubuntu 22 AMI
- Click “Continue to Subscribe”
- Accept the terms and click “Continue to Configuration”
- Select your preferred AWS region
- Click “Continue to Launch”
Recommended Configuration
- Instance Type: t2.large or higher (recommended for production workloads)
- Storage: Minimum 20 GiB (adjust based on data flow requirements)
- Security Group:
- Port 80 (HTTP)
- Port 443 (HTTPS)
- Port 22 (SSH) – Only open to trusted IPs
Step 2: Connect to Your Instance
Secure Shell (SSH)
- Wait for the instance to reach the running state in your cloud console
- Locate the instance’s Public IP address
- Use an SSH client with your private key file
- The default username for Ubuntu AMIs is typically ubuntu
Command: ssh -i /path/to/your-key-pair.pem ubuntu@<Instance-Public-IP>
Username: ubuntu
Key File: /path/to/your-key-pair.pem
Instance IP: Your instance public IP
Step 3: Verify Apache NiFi Installation
Once connected to your Ubuntu Server, verify Apache NiFi is properly installed and operational using these methods:
Method 1: Service Status and Port Check
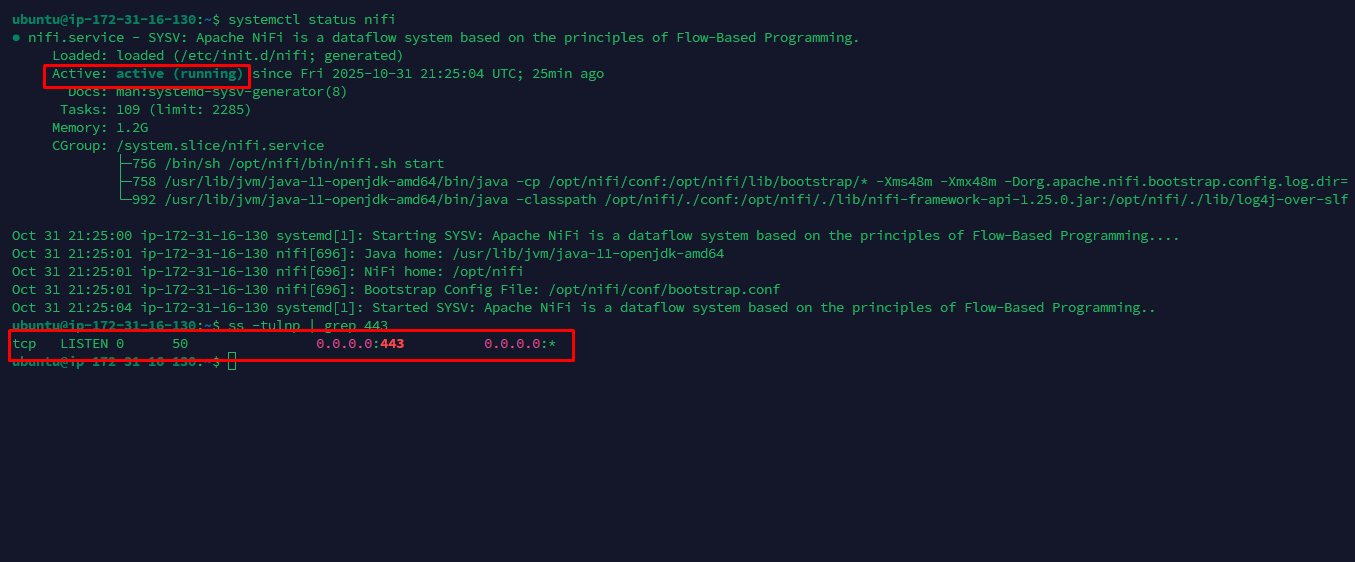
A. Verify NiFi Service Status.
- Check that the NiFi service is active and running:
systemctl status nifi- Verification: The output should show the service status as active (running)
Status: active (running)
B. Verify Port Listening.
- Check that the NiFi service is active and running:
ss -tulnp | grep 443- Verification: The output should show the service status as active (running)
Method 2: Web Interface Access
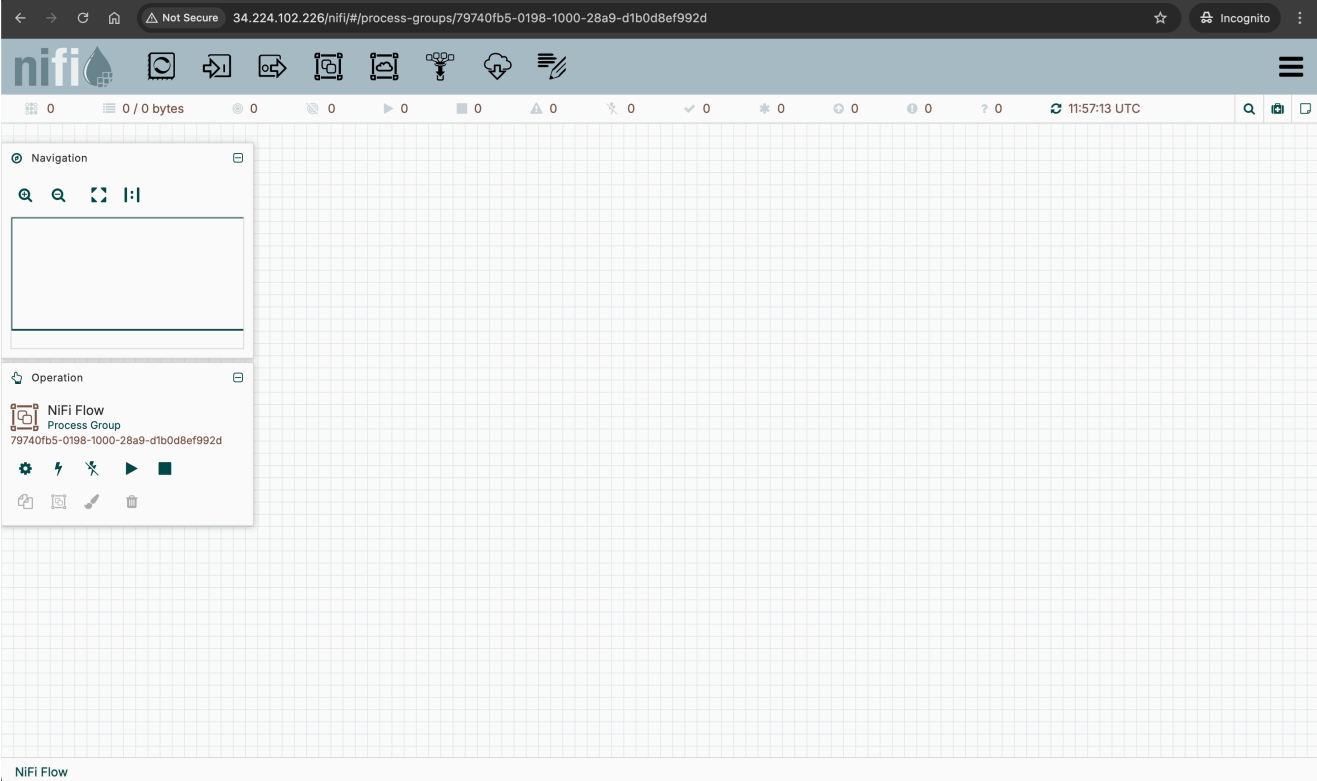
Open your web browser and navigate to your instance’s public IP address (proceed via advanced for the certificate warning):
https://your-instance-public-ipExample:
https://34.224.102.226
You should see the Apache NiFi dashboard, confirming successful installation and web access.
Related AMIs
SQL Server 2019 Standard on Ubuntu 20.04
Run SQL Server 2019 on Linux with Ubuntu Server for cost-effective and flexible database hosting.
SQL Server 2019 Standard on Windows 2019
Standard edition with essential database features for mid-sized workloads, reliable performance, and basic high-availability support.
SQL Server 2019 Enterprise on Windows 2019
Enterprise edition with advanced features for mission-critical workloads and large-scale deployments.
Browse All AMIs
Explore our complete collection of SQL Server AMIs with different versions and configurations.