Quick Navigation
Ubuntu 20.04 with SQL Server 2019 Standard
This comprehensive guide covers all steps to launch, and verify your SQL Server 2019 Enterprise instance on Ubuntu Server 20.04.
Overview: This AMI provides a pre-configured Ubuntu 20.02 environment with SQL Server 2019 Standard Edition, ready for immediate database operations.
Step 1: Launch EC2 Instance
- Navigate to the SQL Server 2019 Standard on Ubuntu Server 20.04 AMI
- Click “Continue to Subscribe”
- Accept the terms and click “Continue to Configuration”
- Select your preferred AWS region
- Click “Continue to Launch”
Recommended Configuration
- Instance Type: t3.medium or higher
- Storage: Minimum 50 GiB
- Security Group: Port 22 (SSH), Port 1433 (SQL Server)
Step 2: Connect to Your Instance
Secure Shell (SSH)
- Wait for the instance to reach the running state in your cloud console
- Locate the instance’s Public IP address
- Use an SSH client (like Terminal on macOS/Linux, or PuTTY/Windows Terminal on Windows) and your private key file
- The default username for Ubuntu AMIs is typically ubuntu
ssh -i /path/to/your-key-pair.pem ubuntu@<Instance-Public-IP>
Username: ubuntu
Key File: /path/to/your-key-pair.pem
Instance IP: Your instance public IP
Step 3: Verify SQL Server Installation
Once connected to your Ubuntu Server, verify the SQL Server service is active and operational using these methods:
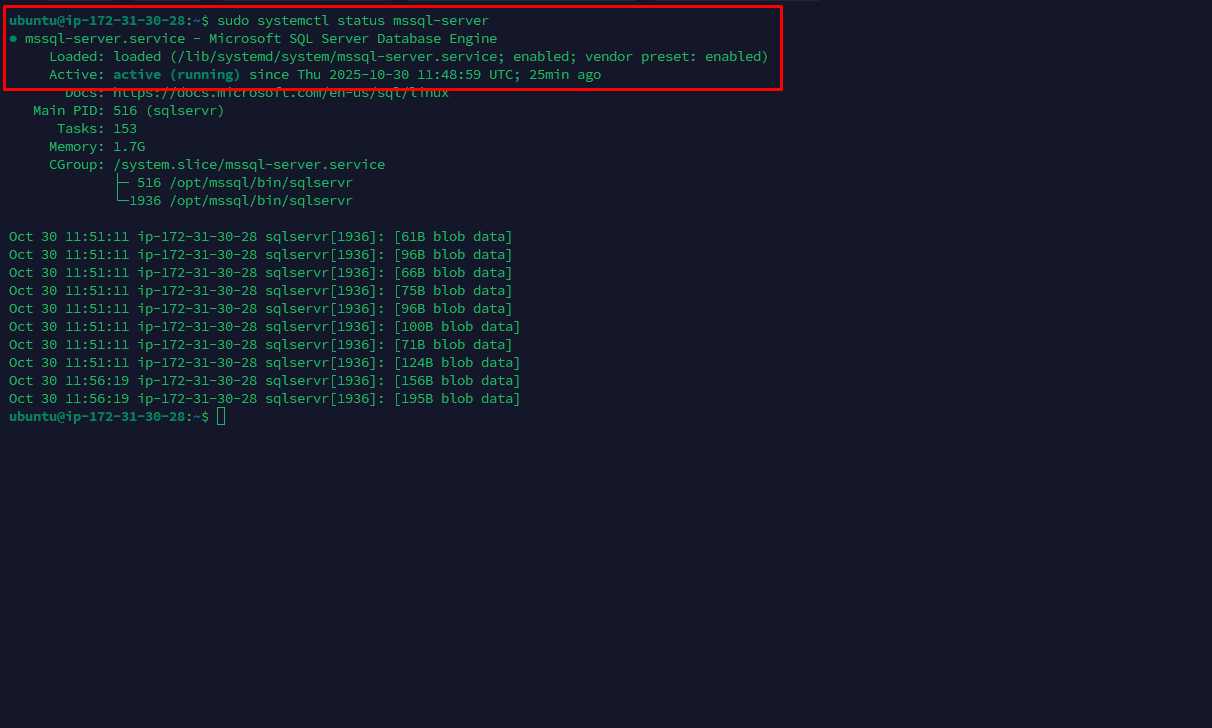
Method 1: Check SQL Server Service Status (systemctl)
systemd under the service name mssql-server.
- Run the following command in your SSH terminal:
sudo systemctl status mssql-server- Verification: The output should show the service status as active (running)
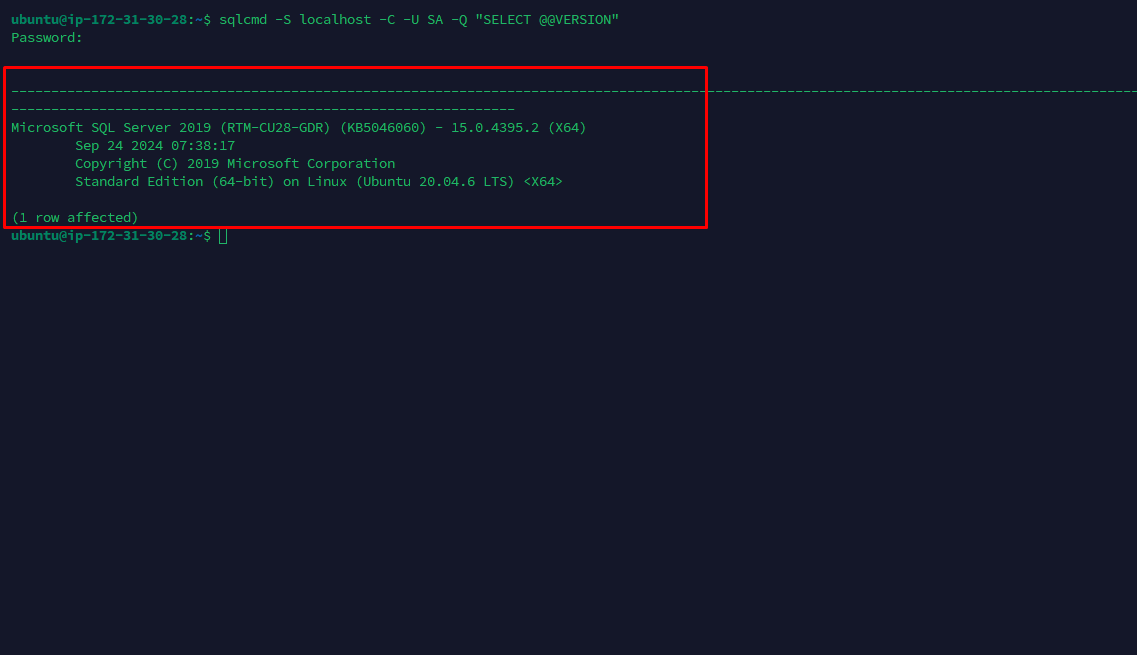
Method 2: Check Installation via SQL Command (sqlcmd)
- Run the command:
sqlcmd -S localhost -C -U SA -Q "SELECT @@VERSION"- Note: This command will prompt you to enter the password for the SA user. The Default SA Password for this AMI is
Gigabits@123. - Verification: The output should return the SQL Server version information (e.g.,
Microsoft SQL Server 2019 ... on Linux (Ubuntu 20.04.6 LTS)).
Expected output:
Microsoft SQL Server 2019 (RTM-CU) - 15.0.4xxx.x (X64)
	on Linux (Ubuntu 20.04.6 LTS)
- Successful query execution = Database engine is operational and accepting connections.
sqlcmd Method 3: Check dpkg Package Installation Status
mssql-server package is installed on the system using the Debian Package Manager (dpkg).
- Run the command:
dpkg -l | grep mssql-server- Verification: The output should start with
ii mssql-server, which indicates the package is installed (i) and configured (i).
Expected output:
ii mssql-server 15.0.4xxx.x amd64 Microsoft SQL Server
ii= Installed and configured confirms the SQL Server package is properly installed.

dpkg Step 4: Change the Default SA Password
For security, you must immediately change the default System Administrator (SA) password. The default password for this AMI is Gigabits@123
- Stop the SQL Server service before changing the password:
sudo systemctl stop mssql-server- Use the
mssql-conftool to set a new password for the SA account:
sudo /opt/mssql/bin/mssql-conf set-sa-password- Follow the prompts to enter a new, strong password
- The password must be at least eight characters long and meet the SQL Server default complexity policy (e.g., characters from three of the four sets: uppercase, lowercase, digits, and symbols)
- Restart the SQL Server service after setting the new password for the change to take full effect:
sudo systemctl restart mssql-server- Verify the service is running after restart:
sudo systemctl status mssql-server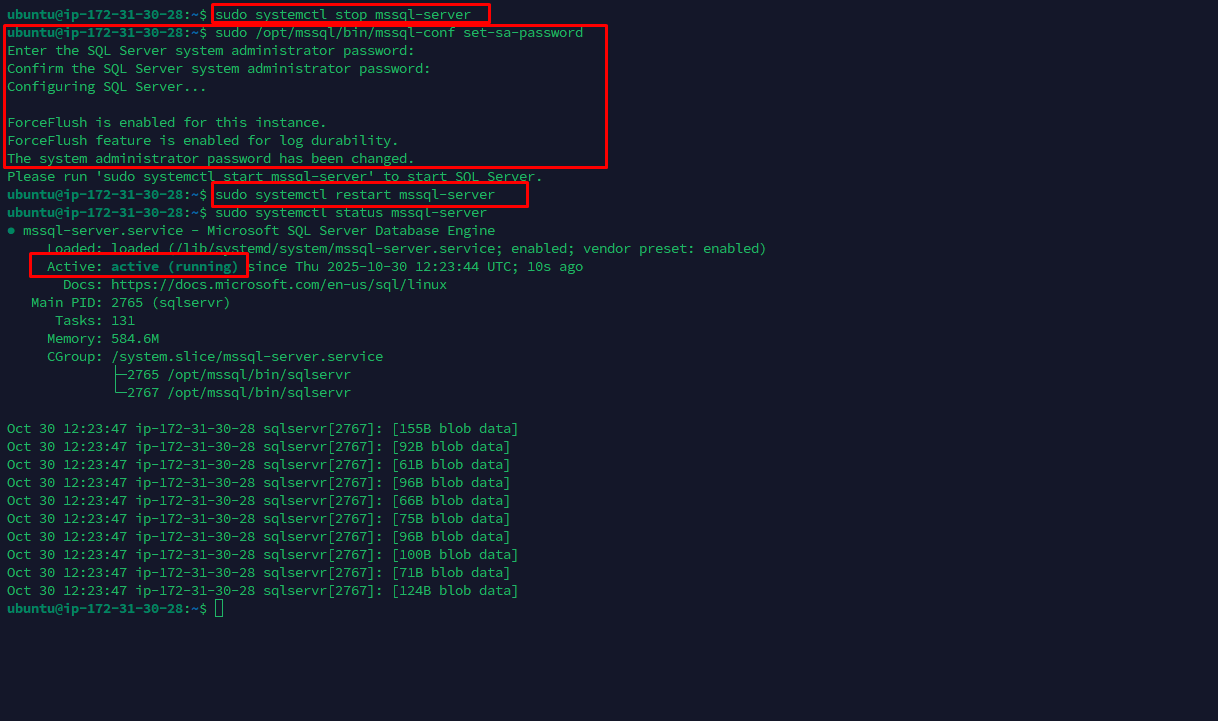
⚠️ Security Recommendation: When enabling remote connections, ensure that only known and trusted source IP addresses are allowed to access the SQL Server instance. This can be achieved by configuring appropriate firewall rules and network access controls.
Related SQL Server AMIs
SQL Server 2019 Standard on Windows 2019
Standard edition with essential database features for mid-sized workloads, reliable performance, and basic high-availability support.
SQL Server 2019 Enterprise on Windows 2019
Enterprise edition with advanced features for mission-critical workloads and large-scale deployments.
SQL Server 2017 Enterprise on Windows 2019
Stable SQL Server 2017 Enterprise edition with proven reliability and comprehensive features.
Browse All SQL Server AMIs
Explore our complete collection of SQL Server AMIs with different versions and configurations.